Mt. Shuksan via Fisher Chimneys into SE Ridge: August 3, 2024
Written by Eric Bultman and Chris Buchta
Quick intro: The purpose of this is to provide some objective information on our planning for and trip up Shuksan, to help others also have a successful day in the mountains. There is a ton of info out there on the Fisher Chimneys and the SE Ridge. I read multiple trip reports, watched a couple videos, and read route descriptions on various sites. Chris and I have a planning template that we have used in the past that has worked well. We collaborate there on anything from weather forecasts to gear lists.
I am an amateur at best. And while I hope some of this will be helpful or interesting to someone please make decisions based on what will be best for you.
I’d also like to acknowledge that because we did this in a single push, our packs were relatively light and small. Often parties will choose to camp above the Fisher Chimneys which means carrying significantly more weight and bulk through that section. This will create a different experience than we had getting up and down.
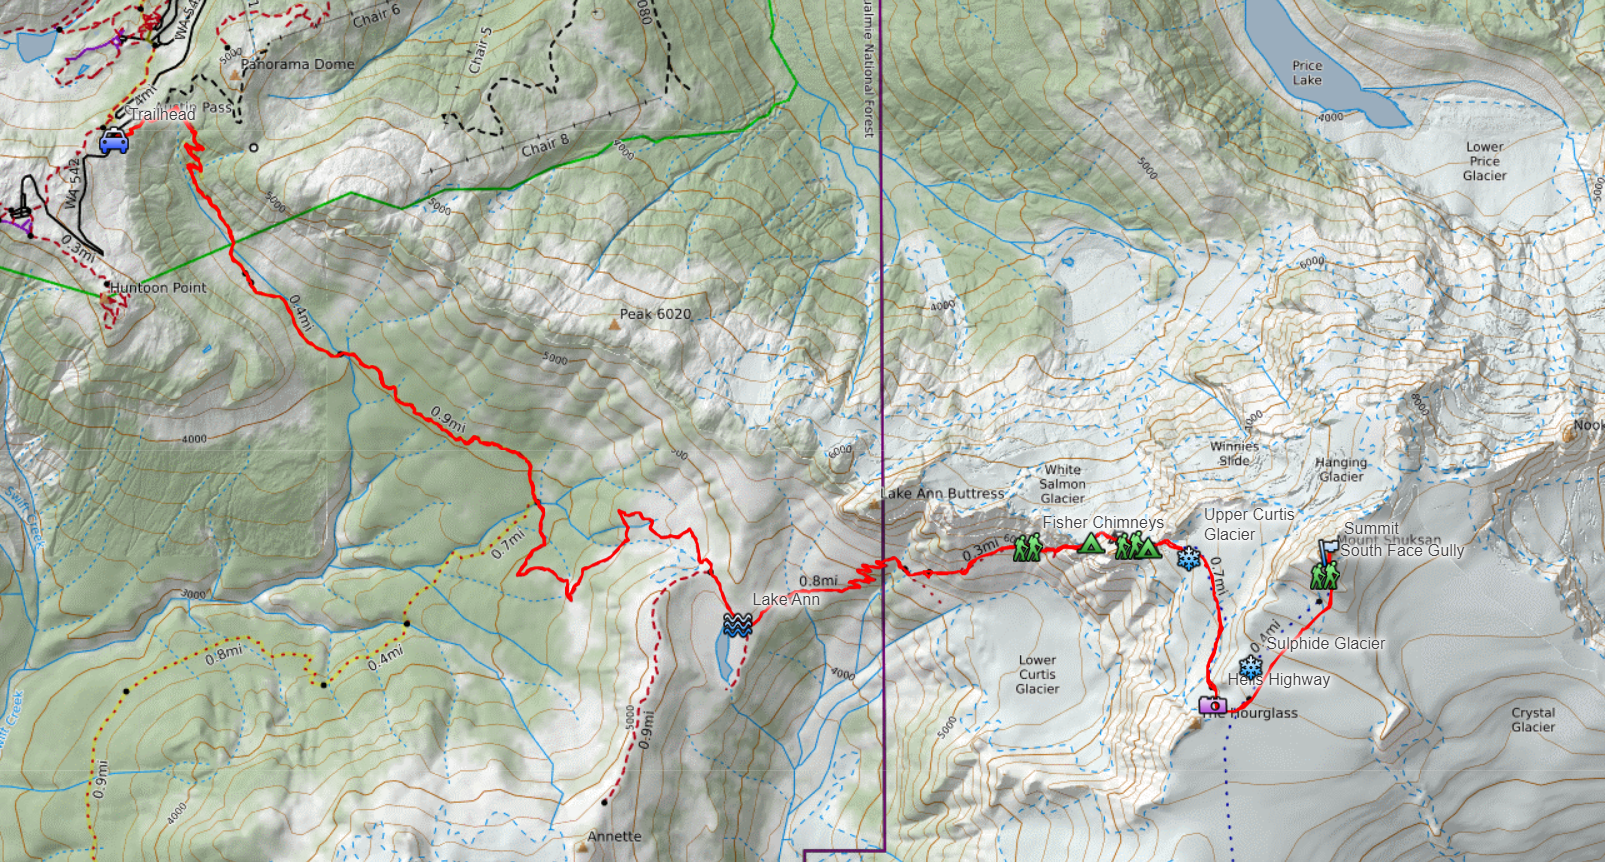
Strava Post, where you can download our gpx track.
Time of year and conditions: Fisher Chimneys has a smallish window for “ideal” conditions. Trip reports through the years typically fall into late-July through late-August. Of course things can be drastically different year over year. Chris had found a Facebook post from a group that summited the week prior to us and it seemed like the route was in great shape. NPS also had some current info on route conditions: Climbing Conditions - Mt. Shuksan. All of this is a matter of preference and experience. For us, based on experience, it was important that the steep snow/glacier sections (Winnie’s Slide and Hell’s Highway) would be snow, and not exposed glacier ice. I found at least one report that was stoked for the potential of later season ice that appears as things melt out, live your truth.
Objective markers when considering timing:
-Conditions in the Fisher Chimneys. We were happy with no snow.
-Conditions of Winnie’s Slide and Hell’s Highway. We were looking for snow to kick steps. Can get icy later in the season.
-Conditions at the summit pyramid. In general, I think if the Chimneys are melted out snow will not be a huge issue at the pyramid. There was likely always going to be a way for us to gain the SE ridge where it met with the current snow level.
Timeline and beta:
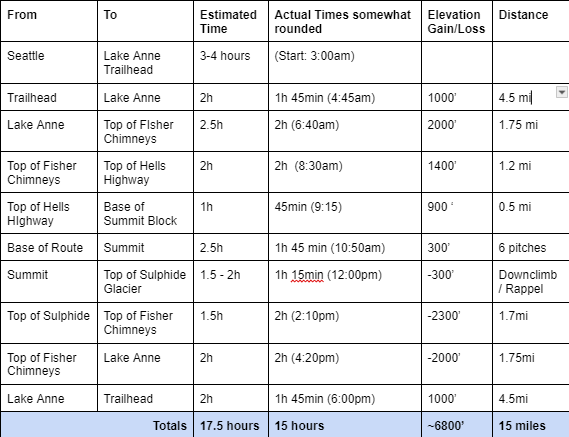
This is part of our planning doc that we use to estimate trip times. I’ll also go into some details on each section. My watch clocked a total elapsed time of 14 hours, 51 minutes, and 41 seconds.
Trailhead, Start Time 3:00am:
Chris and I slept for a few hours in his car at the Lake Ann trailhead. Start time was a game of beginning as early as possible without doing any of the Fisher Chimneys section in the dark. Dawn was set for around 5:00am and we figured about 2 hours to get to Lake Ann. Realistically we could have started 30-45 minutes earlier and still met our goal. As there is about a mile of uphill hiking to do past Lake Ann.
Trailhead to Lake Ann, 1h 45min, 3:00am to 4:45am:
Immediately lose about 1000’ of vert in 2.5 miles on pretty cruiser trail. It did get muddy at times at the bottom. Then gain 1000’ by hiking 1.5 miles up to Lake Ann. This was all done in the dark for us.
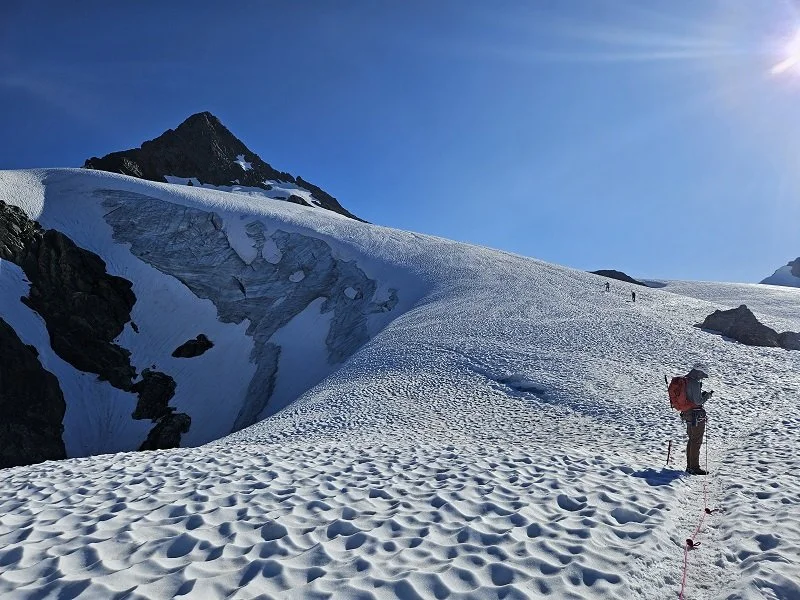
Our first view of the Upper Curtis Glacier and Hells Highway from the trail up and past Lake Ann.
Lake Ann to Start of Fisher Chimneys, 1hr, 4:45am-5:40am:
In our timing table, the first hiking row should potentially be Trailhead to Start of Fisher Chimneys. I wanted to leave the table in its original form but I’m adding this section here, mostly to separate the Fisher Chimneys into its own section. Lake Ann to the Start of the Chimneys was 1 mile of some rock walking and uphill switchbacks on trail. The final bit before the start of the Chimneys has a snow finger reaching down a narrow gulley that was pretty loose with dirt and rocks. We chose to cross this below the snow which worked well. Some of this time accounts for stopping to change from trail runners to approach shoes which would be used for the rest of the day until we got back to Lake Ann on the way out.
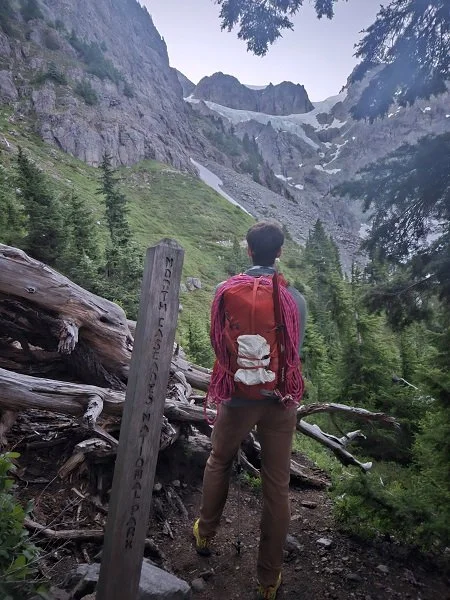
Chris taking a look at our eventual path up Shuksan. Sign post marking the crossing into North Cascades National Park.
Snow crossing and the start of the Fisher Chimneys. We went below the snow to cross and stopped to swap footwear on the scree to the right in the image.
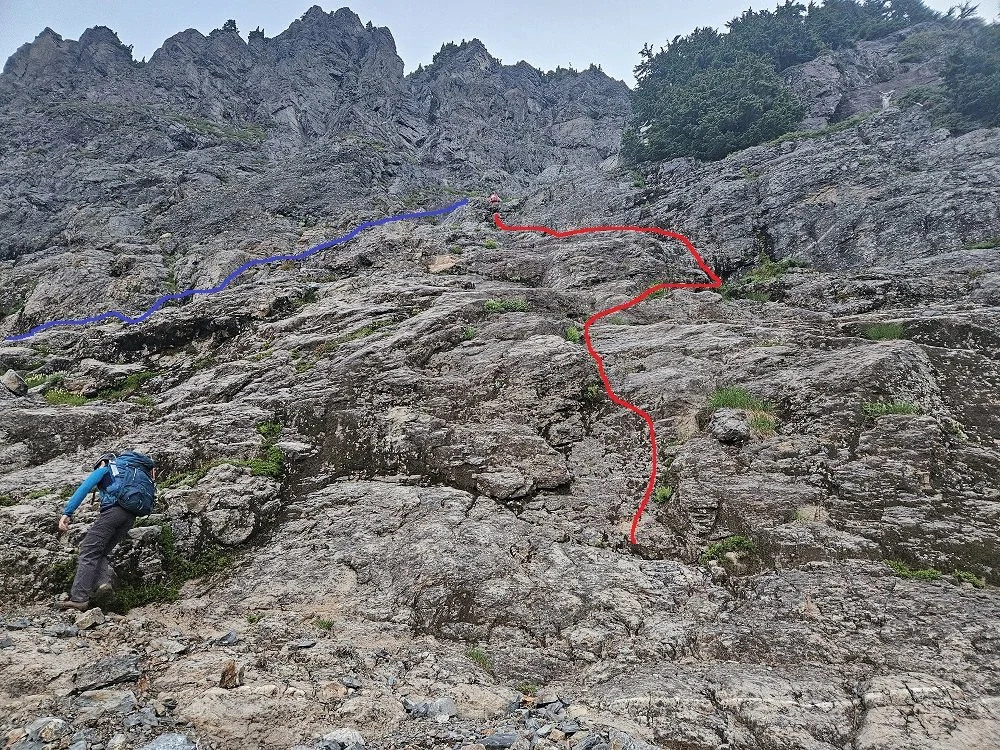
Looking up at the start of the Chimney section with the red line showing my best guess at recollecting my route. Use your best judgment, a lot of different ways to go. Chris at the top of the red line. We did not end up coming down this way but instead came down an easier scramble that is not quite in this picture. The blue line is a very rough estimate at that route from this viewpoint, but the blue line is not the exact route.
Fisher Chimneys Bottom to Top, 1h, 5:40am-6:40am:
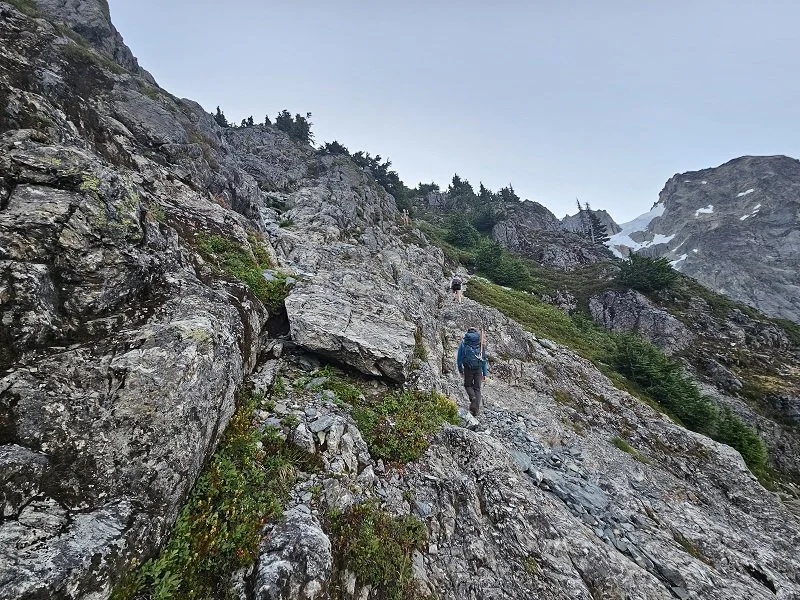
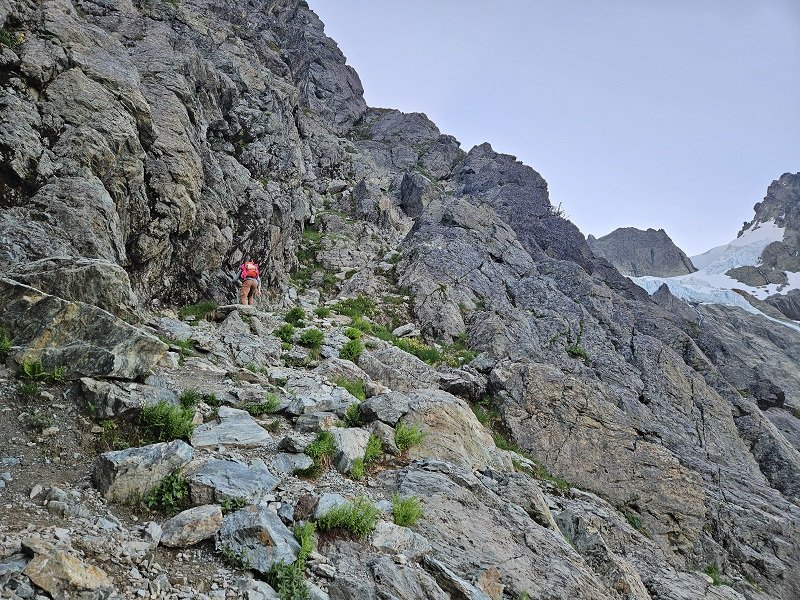
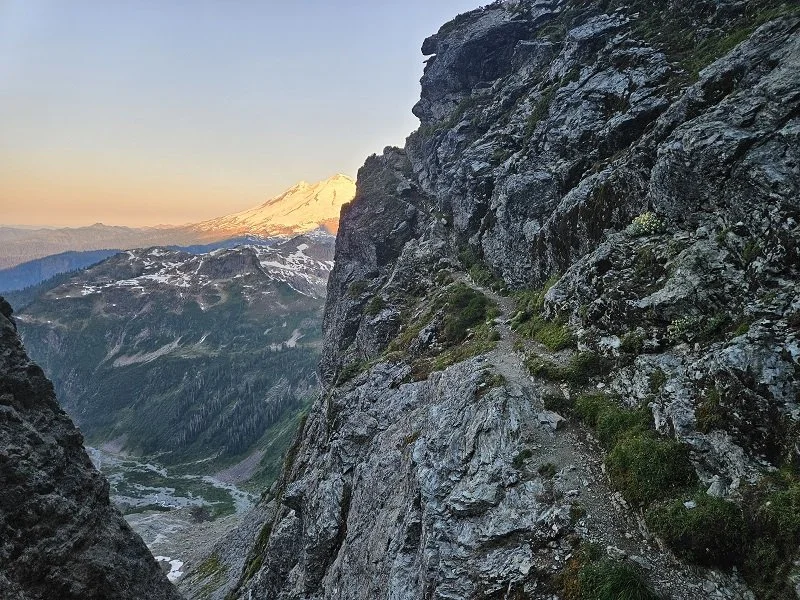
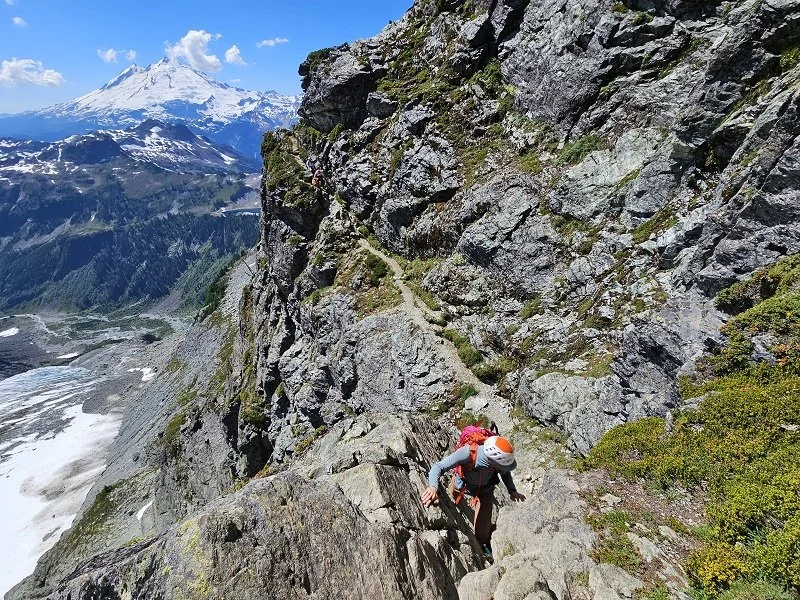
I read a lot of reports saying that once you were on top of the first scramble, the Chimneys would be easy to follow. I would tend to agree with this. There is a bit more scrambling to go after continuing on from what is shown in the picture above but that quickly leads to a hike across a rock field. We then got into multiple sections of 3rd/4th class scrambling mixed with short sections of trail. There were a few moments of significant exposure. Notably, a section of trail pictured below that requires an airy step, continues along an exposed trail and leads into a dihedral of sorts. There were a couple sections with right and left options that both went. In general, stick to the rock that is clean from moss and look up in the scramble sections to find the rappel anchors that will help guide you.
Continuing up the Chimneys from the initial scramble. There is a lot of good rock and the best path is generally easy to follow.
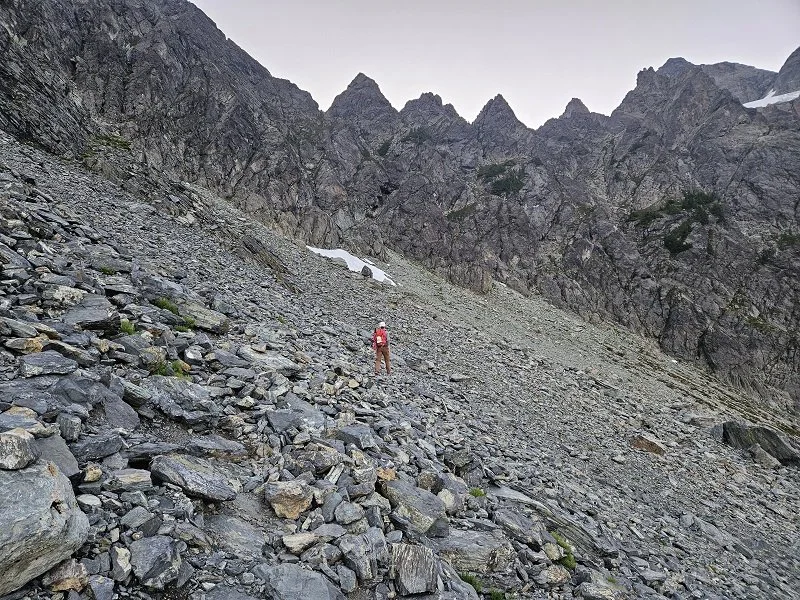
Crossing the scree field headed to the ‘second’ scramble portion of the Chimneys.
Moving through some of the “trail” on the Chimneys.
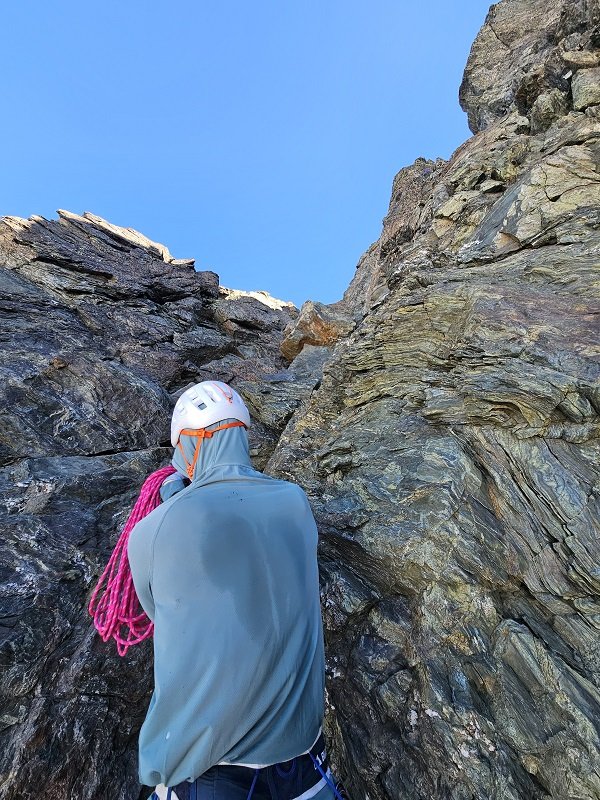
Chris on the dihedral feature. Butt shot.
From the top of the dihedral. Looking back at the exposed section of trail leading to it. There are good holds for confidence when you want it. Mt. Baker glowing in the morning sun behind.
Top of Fisher Chimneys to Top of Hells Highway, 2h, 6:40am to 8:30am:
Going to break this up into subsections. There are a few notable features between the top of the Chimneys and meeting up with the Sulphide Route at the top of Hells Highway.
-Top of Fisher Chimneys to top of Winnie’s Slide:
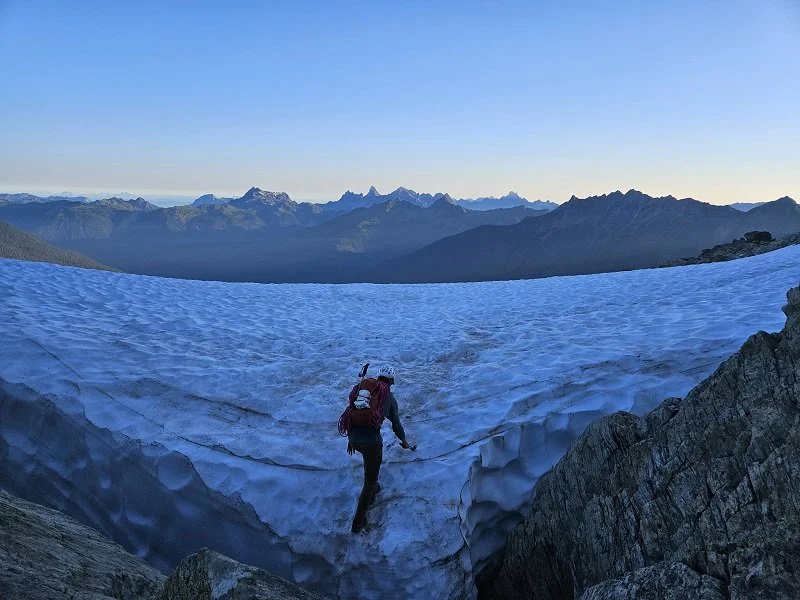
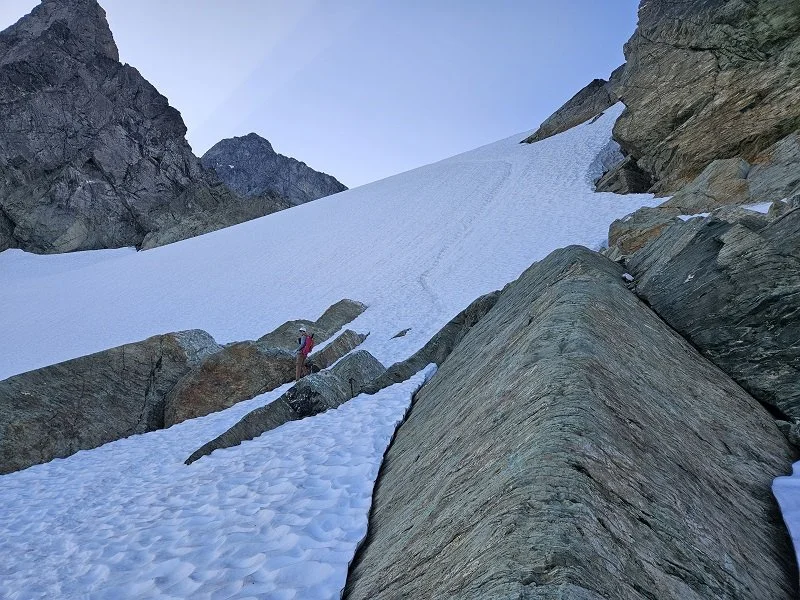
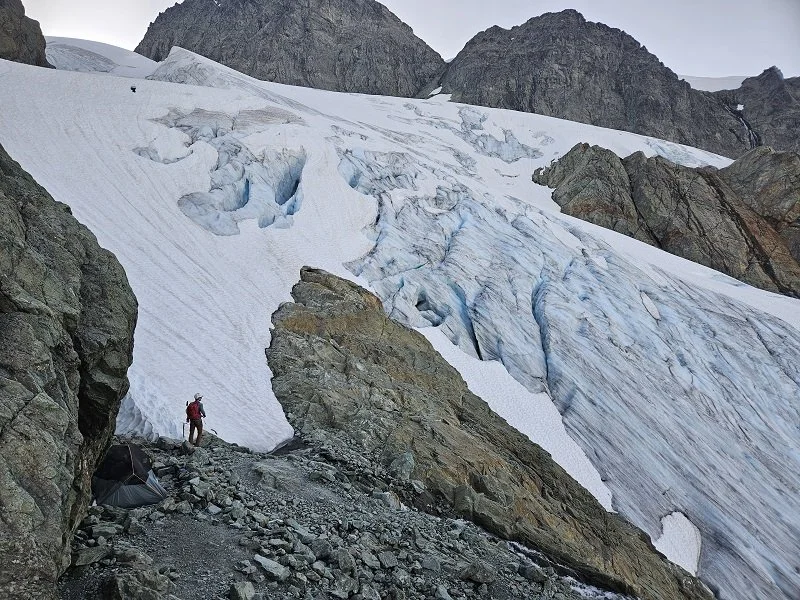
After reaching the top of the Chimneys we found the snowy top of the White Salmon Glacier. There was a moat forming between the rock and snow which required dropping down a few feet before climbing on the snow. This is where we put on crampons and took out our ice axes. There was a boot pack through the snow, the path was easy to follow. After a bit of snow there was a small rocky section with a few campsites which lead to the bottom of Winnie’s Slide. There was a small water trickle coming down from Winnie’s Slide that could be used to refill. Winnie’s Slide is fairly short and fairly steep but was easy enough to get up with the staircase steps that were kicked in the slope. At the top of Winnie’s Slide is a rock outcropping with a handful of tent sites (I just saw a picture with 6 tents up there) and a plentiful water source which then immediately connects to the Upper Curtis Glacier. This would be the last running water before summiting. We breaked here to refill water, eat some snacks, and prepare for glacier travel.
Chris climbing onto the upper White Salmon after reaching the top of the Fisher Chimneys.
Looking up at Winnie’s Slide and the nice boot pack we took. Where Chris is standing was a small water stream but enough to fill a bottle with.
Chris at the outcropping above Winnie’s Slide, looking at the Upper Curtis Glacier. A couple tent sites and fresh glacial melt. The path onto the Upper Curtis is immediately to Chris’s left.
-Upper Curtis Glacier
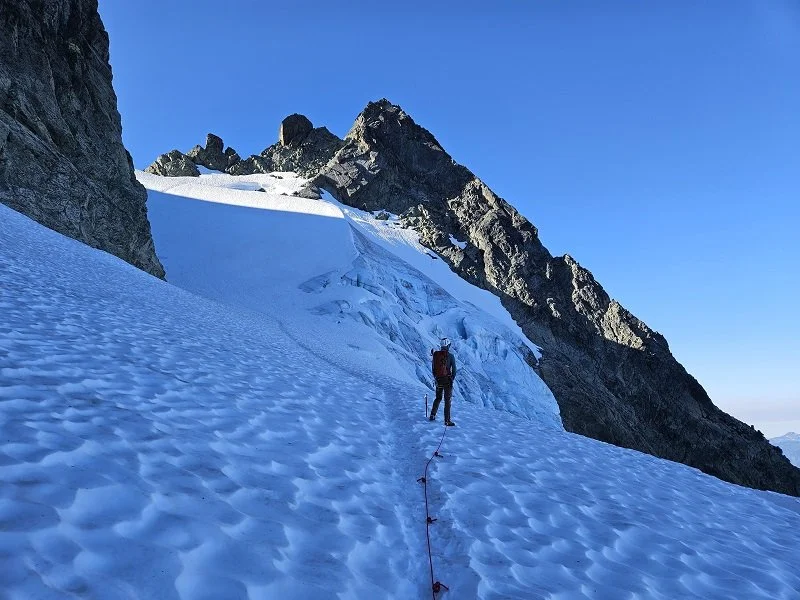
The Upper Curtis Glacier bootpack went straight up a slope to get above some crevasses and then veered right to traverse the glacier. I don’t have any pictures of walking across the bulk of the Upper Curtis. We found that the bootpack generally took a good path but at times crossed very near to and likely over multiple cracks. In the earlier half of the Upper Curtis traverse we encountered maybe 30-40 feet of exposed ice that was very low angle and easy enough to walk on with crampons. The path headed up towards the rocky cliffs below the summit before continuing down for about 200’ leading to the bottom of Hells Highway.
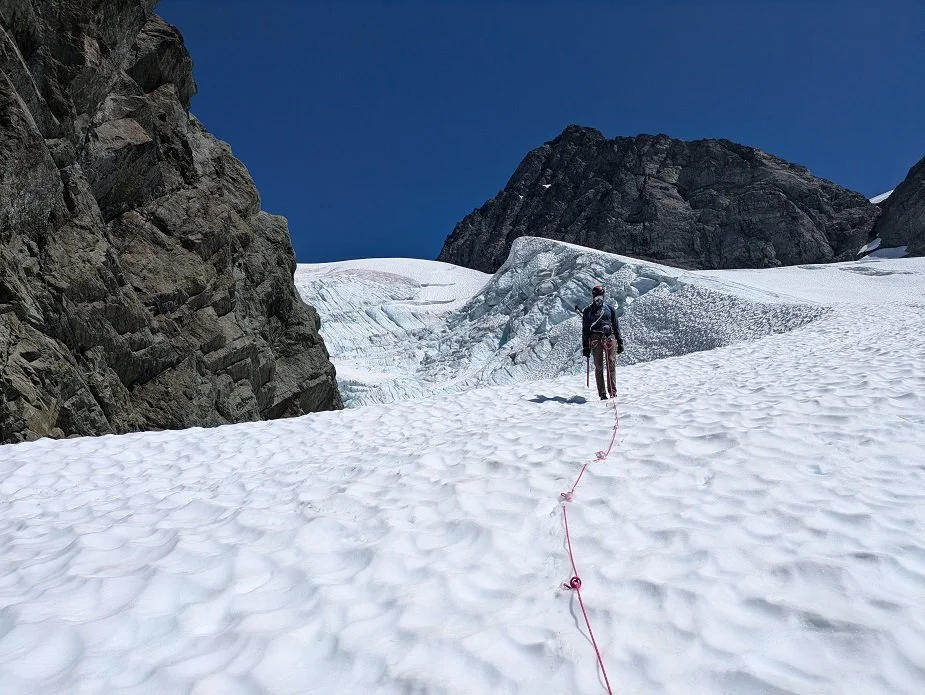
Moving across the Upper Curtis Glacier. You can see the boot pack leading up Hells Highway ahead.
Looking back at the Upper Curtis Glacier downhill section.
Slightly closer shot of the path leading to Hells Highway.
-Hells Highway
Hells Highway had a mellow start and quickly gains steepness. For us, it was entirely covered in snow. The bootpack provided a nice staircase for a fairly mellow climb that took about 15 minutes. I thought the runout would have been arrestable and not catastrophic if a fall happened.
Me climbing Hells Highway.
Top of Hells Highway to Base of Summit Block, 45min, 8:30am to 9:15am:
After topping out Hells Highway we merged with some climbers coming from the Sulphie Route. This section is a straightforward glacier slog to the summit block. There were some cracks opening up that the bootpack moved around. There is a photo below of the snow levels as we approached the summit block. The main bootpack went up the snow towards the gulley route, we turned right off the main path to gain the SE ridge when we spotted a potential transition point. Continuing to follow the standard route a bit higher through the snow would likely also give access to the SE Ridge
After reaching the top of Hells Highway. Looking towards the summit pyramid. You can see some fellow climbers coming from the Sulphide.
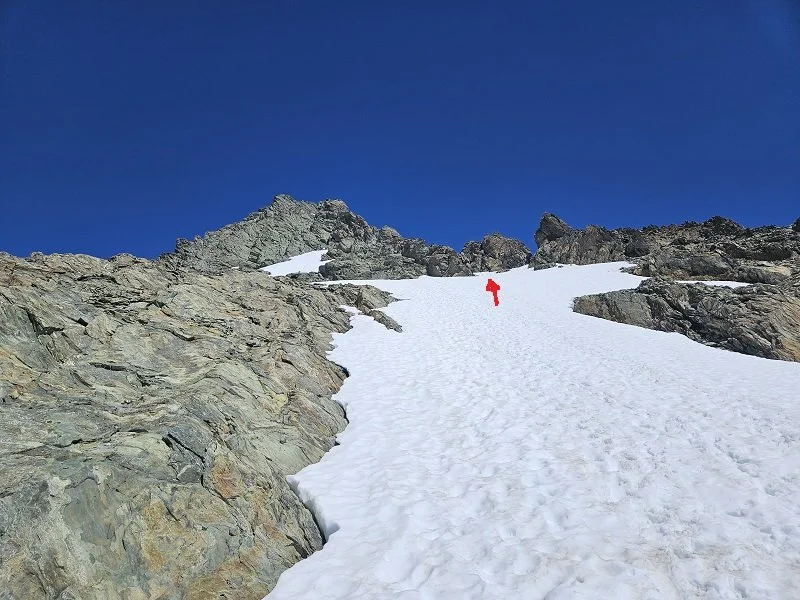
Unfortunately, I did not get great photos of where we got onto the SE ridge. This is a picture looking up at the summit pyramid with the arrow pointing at a snow finger where we got onto rock. This is going to change fast as snow melts.
Base of Summit Block to Summit, 1h 45min, 9:15am to 10:50am:
Immediately off the snow we scrambled some 3rd/maybe 4th class terrain while working up the ridge. Looking up, the route to the summit is straightforward, stick to the ridge. We saw multiple parties in the gulley route going up and down as we climbed the ridge, the routes are very close to each other. We also had multiple parties ahead of us also showing the way. After scrambling for maybe 10 minutes we found a ledge which made for a good spot to rope up and climb. We had planned to simul climb as much as possible with Chris in front and myself in back. Chris took off leading and for protection throughout the entire route placed 2 tricams, 3-4 nuts, and slung features. Much of the lower portion of the route was easy 3rd class climbing with a bit of exposure. You can pretty easily stick to the ridge and follow the path of least resistance, slinging naturals as you go. There were a few sections to downclimb or step across but nothing too extreme. After a bit of simul climbing we were up against another party at a ledge where Chris stopped and belayed me up. This was right below the “crux” of the route where there is a relatively steeper section of “5.3” climbing. There are good handholds directly up the face, but a bit of a big step, Eric found some better feet by going left along the corner of the face towards the standard ascent gulley. After this it's more easy scrambling to the summit. Overall, I would describe much of the climbing as exposed scrambling with a few low fifth steps mixed in.
When taking this photo I was standing on snow and we were looking at the gulley we scrambled up to start the climb.
Starting the SE Ridge with some scrambling after getting off the snow.
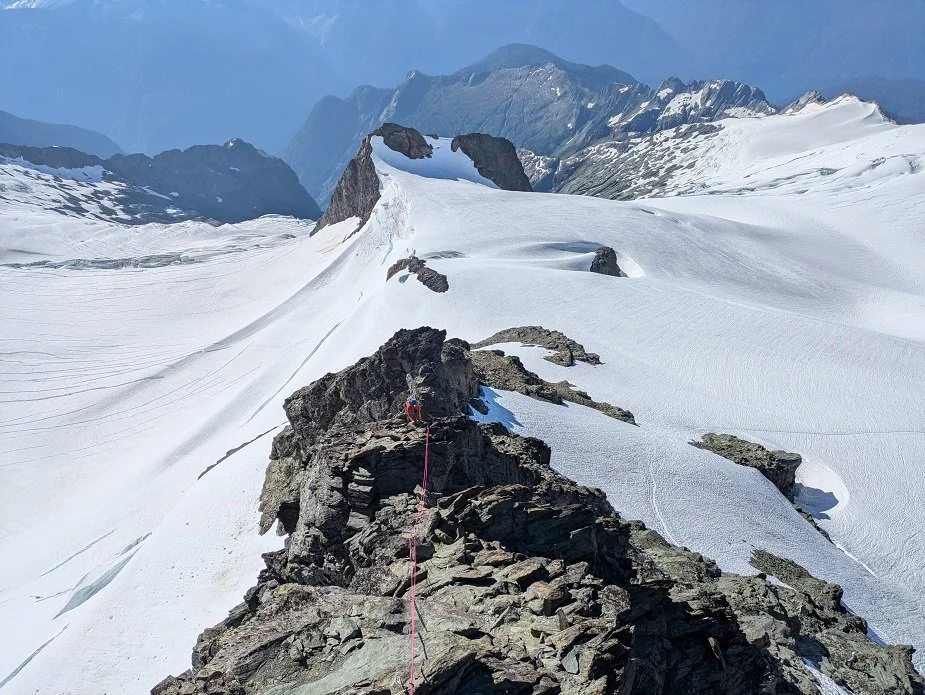
Roped up on the ridge.
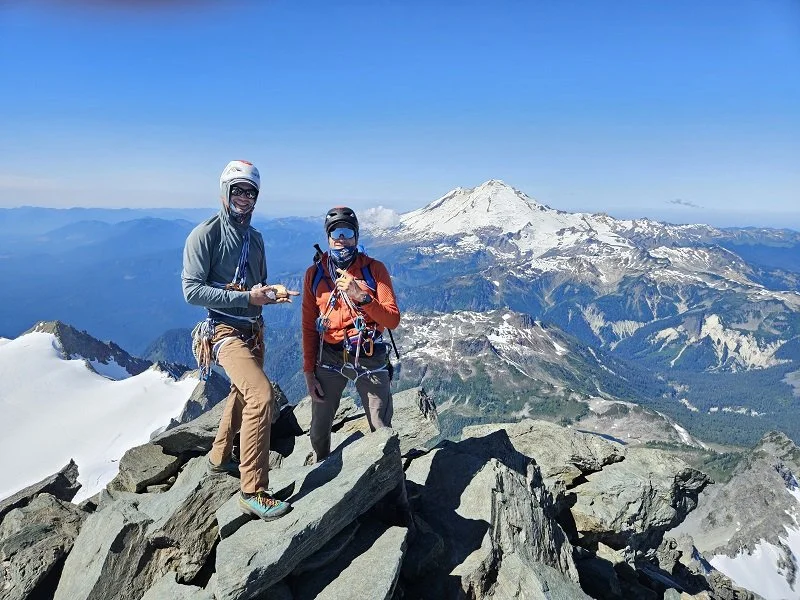
The Butter Baguette Boys
Summit to Base of Summit Block, 1h 15min, 10:50am to 12:00pm:
We spent some time enjoying the summit while assessing our best path down, acknowledging that we still had a lot of work ahead of us to get back to the car. We were eager to descend the steep snow and get off glaciers before the heat of the day made things sloppy. While we were at the summit there were at least 15 people sharing it with us. The main rappel route down the gulley had a line of 7 people. There were 5 others including a guided group that had scrambled up and over the summit to another rappel station on the west side of the summit block that eventually met with the main rappel route. Chris and I followed that guided group but eventually decided to downclimb after finding a route into the main gulley. We found slightly different paths down through the gulley, I found the downclimbing to be secure with a lot of good hand and feet options. Towards the bottom of the gulley I borrowed a rappel setup from a party in order to avoid a steep snow downclimb. The gulley had many rappel stations, often with a party or two waiting their turn, you could easily rappel the entire thing making it down to the low angle show at the bottom. For efficiency, downclimbing was the right choice for us. I’d guess we would have been 1-2 hours slower had we rapelled the gulley to get off the summit pyramid. I didn’t get my eyes on too many rap stations but the ones I saw looked solid with newer cord or webbing on solid features. The route is often guided and set up well.
Base of Summit Block to Top of Fisher Chimneys, 2h 15min, 12:00pm to 2:15pm:
Base of the summit to the top of Hells Highway was very straightforward. We roped up after getting off the rock and walked in the same boot path we took up.
Results may vary getting down Hells Highway. Chris and I chose to downclimb Hells Highway and remained tied into the glacier rope. This was the most strenuous part for me as I don’t have a ton of experience downclimbing steep snow. That being said, the staircase in the snow that took us up also guided us down and provided a secure path. Chest facing into the snow, took it one step at a time and eventually arrived at the more mellow slopes towards the bottom.
Heading back across the Upper Curtis Glacier was mellow to start but cracks were looming off to the side. We gained 200’ heading north across the glacier before reaching the section with exposed ice we encountered on the way up. The area around the exposed ice also has a lot of cracks opening up which is why I don’t have photos of it but we were thankful to make it through without incident. The boot pack then led us back to the rock outcropping and water source where we stopped for a break and coiled the rope.
Getting down Winnie’s Slide felt easy compared to getting down Hells Highway. I still chose to go chest in for the steepest part of it. We took crampons off at the lower campsites after getting down Winnie’s Slide.
A quick snow crossing across the upper White Salmon took us back to the top of the Fisher Chimneys.
Cruising down the Sulphide.
Coming down the Upper Curtis Glacier.
Fisher Chimneys Top to Bottom, 1h 15min, 2:15pm to 3:30pm:
We chose to downclimb the Chimneys. There were rappel stations with cord and/or webbing, even the occasional piton, above all of the relevant scramble sections. I found the downclimbing to be secure with good hands and feet whenever I needed them. The route was easy to follow.
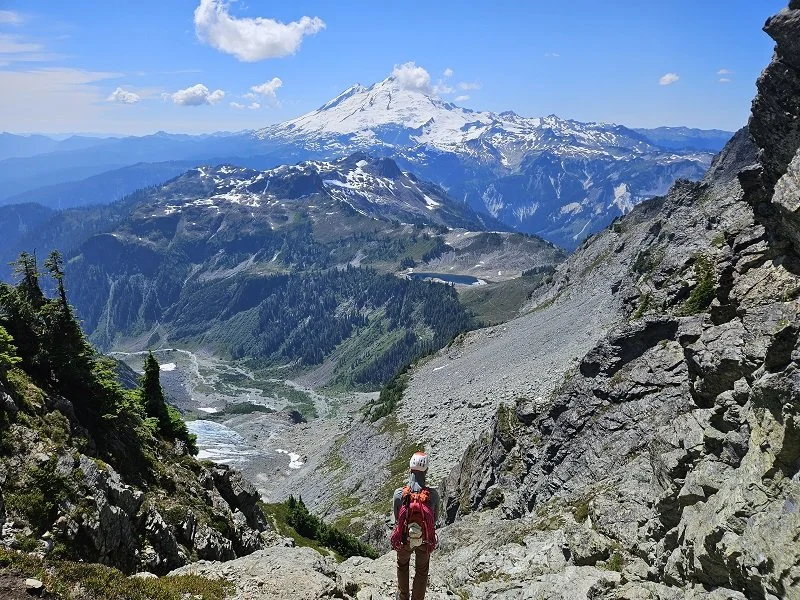
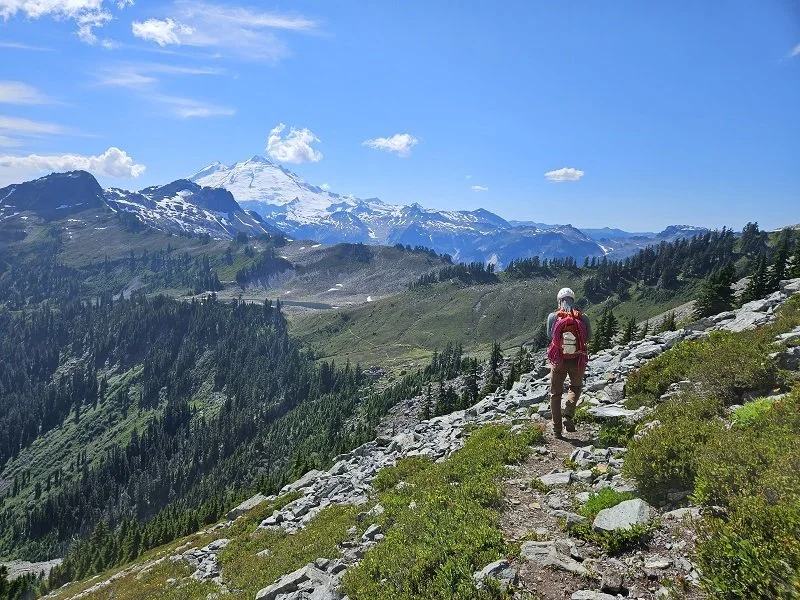
Chris taking in the massive Mt. Baker wilderness.
Downclimbing the dihedral.
Me not being brave enough to let go of the rock for this section of trail.
Bottom of Fisher Chimneys to Trailhead, 2h 30min, 3:30pm to 6:00pm:
After reaching the bottom of the Chimneys we opted to continue hiking in our approach shoes until we reached a water refill spot where we would take a final break before finishing the hike out. Just before reaching Lake Ann we stopped at a creek crossing to dry out our feet a bit before swapping back into trail runners for the final 4ish miles of hiking to the car.
All easy trails from here. Heading towards Lake Ann in the distance.
After getting back to the car, Chris and I drove up to the Artist Point parking lot and found a nice rock to sit on while we refueled our bodies with cold chocolate milk and admired the large mountain that we stood on top of earlier that day.
Gear: (I’d like to come back to the gear section and label each product, coming soon)
Shoes and Clothes:
Overall this kit worked well. My OR Gore-tex gloves are a bit bulky and usually overkill for summer temperatures but they keep my hands warm and dry if I have to stick them in snow. I did not use my puffy or wind/rain layer, I think an argument could be made that the mid-layer wasn’t necessary given the warm forecast we had, and the fact that only 2 hours of the trip would be in the dark. No regrets with bringing extra layers though. They are fairly light and I had the space. The trail runner and approach shoe combo worked well. It was nice to have a dry pair of shoes to change into after getting down the Chimneys in our soaking wet approach shoes.
Trail runners
Approach shoes
Two pairs of socks
Beanie
Gore-tex gloves
Liner gloves
Visor
Buff
Compression shorts
Prana pants
Sun hoodie
Mid-layer
Puffy
Light wind/rain later
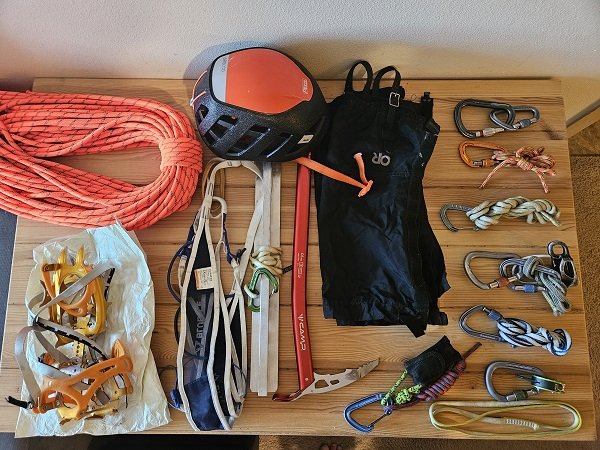
Climbing and Glacier Gear:
I did not use the gaiters and probably wouldn’t bring them if I did it again. They would have kept my feet slightly drier from snow but would have been warm and sweaty, not worth it for me. Aluminum crampons worked well for us given the condition we expected to encounter. Steel crampons could be a good call for anyone who doesn’t mind the weight and is looking for extra stability on Winnie’s Slide and Hells Highway, and would likely become necessary later in the season as more ice is exposed. As everything continues to melt, an ice screw could find use to provide running belays or to assist in a rescue. We intended on bringing walkie talkies and accidentally only brought one, it never felt necessary to have them. That being said, Chris and I were never more than 30m of rope apart since we climbed on the doubled up 60m glacier rope.
Rope
Aluminum crampons
Helmet
Alpine harness
Picket
Ice axe
Gaiters
Glacier kit:
2 loose lockers
1 prusik loop on a locker
1 triple length sling on non-locker
ATC with locker
Hollow block with locker
1 double length sling on locker
Progress capture pulley on locker
1 Knife and 1 prusik loop on non-locker
1 Single length sling
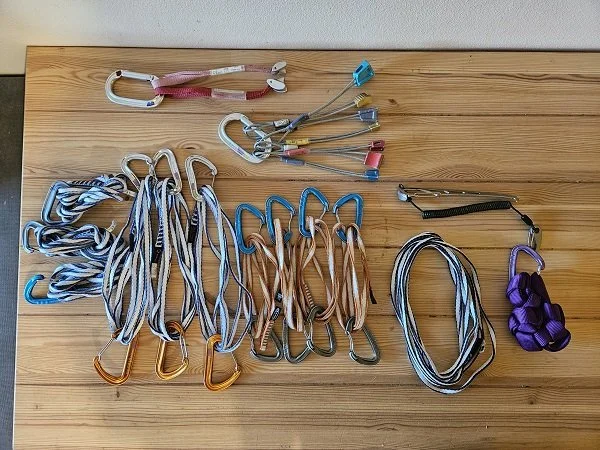
Rack for the SE Ridge Climb, some glacier gear overlaps with gear that was used on the climb:
Some notes from Chris: I think this worked well - if planning to sling naturals I think triples would be the best for that (allows you to sling a larger horn AND still have some extension to prevent rope drag). Doubles worked, but not for every natural option due to size.
You could definitely have placed some mid sized cams (.4-#1) but I didn't feel they were necessary. Tricams definitely placed a bit better than nuts in the flakes.
*Not pictured: 2 additional triple length slings, 2 additional single slings
Pink and red tricams
Rack of 7 nuts (5 DMM offsets and 2 CAMP Pro Nuts)
6 double length slings
4 single length slings
Nut tool
1 quad length sling
1 length of webbing
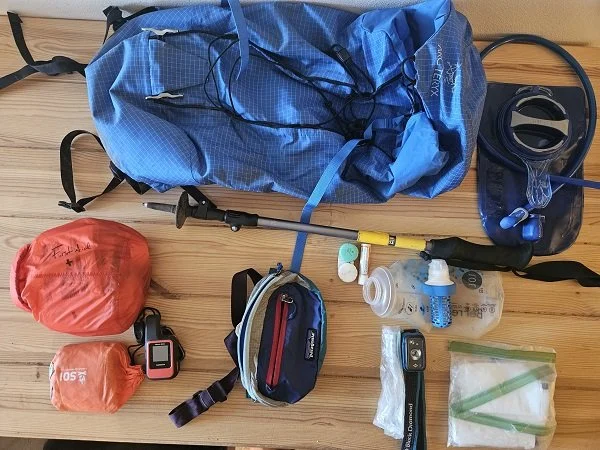
Emergency Gear and Other Stuff:
I don’t love having to refill a bladder with a filter bottle but I like having access to more than one liter of water at a time and I need to filter water somewhere to add powdered drink mix since I don’t want that going through a filter. It works but doesn’t feel ideal. I’m a big fan of the fanny pack for easy access to snacks and a few things like sunscreen and chapstick. I refill it throughout the day with my bigger snack bag in the backpack.
*Not pictured: X-Tiger sunglasses
Pack 23L
Water Bladder 1.5L
First aid Kit
GPS device
Emergency bivy
Trekking Pole
Fanny Pack
Sunscreen (in contact case)
SPF lip balm
Soft flask with filter cap
Headlamp with extra batteries
Bathroom kit
Food/Water:
Starting food. Only one of the salami, cheese, and butter sandwiches was mine. I also started with 2 scoops of Gnarly Fuel 2o in my bladder. In the bags is fruit and nut trail mix with peanut m&ms added, and mini oreos.
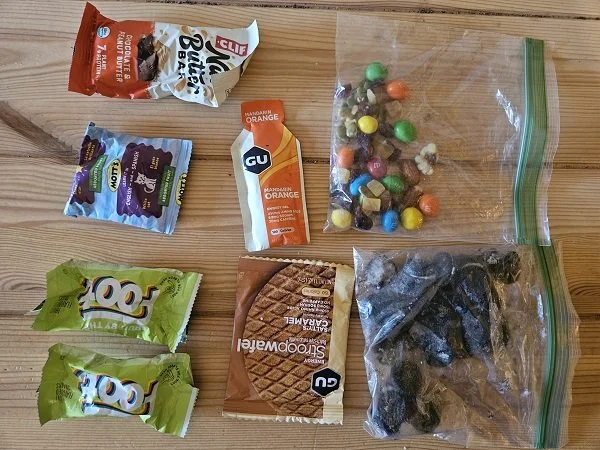
Food not eaten. The Fruit by the Foot is usually a summit treat but I forgot to take them out and they made it back to the car.
Food thoughts: Overall I’m pretty pleased with the amount of food I packed. I had enough left for maybe another 4-5 hours of consistent eating. If I were to do it again I would probably bring one more Tailwind or some sort of powdered mix. I was down to just water for the final couple hours of hiking, which is generally fine but I like to make use of that drinking and get some calories with it. Throughout the day I’d estimate I drank about 6 liters of water, mostly with drink mix in it.
Final Thoughts: We both really enjoyed this trip. The combination of Fisher Chimneys into SE Ridge provided excellent variety throughout the day. The setting and position on the mountain is incredible. Views of Mt Baker right across the valley never got old.
The campsites above and below Winnie’s Slide are beautiful and unique and while I love a good car to car push it would be worth staying the night to spend some more time up there, this requires a permit as it is within the National Park. Camping at Lake Ann is also a good permit-free option for shortening a summit push by a couple hours. For those with the necessary experience and skills, the SE Ridge is the right move compared to summiting via the standard gulley. But the trip with a gulley summit is certainly worth it in its own right.
We noted that the Sloan Peak Corkscrew Route would be a good stepping stone for those looking to attempt the Fisher Chimneys. It is a route with similar variety in terrain but a bit less of everything.
